
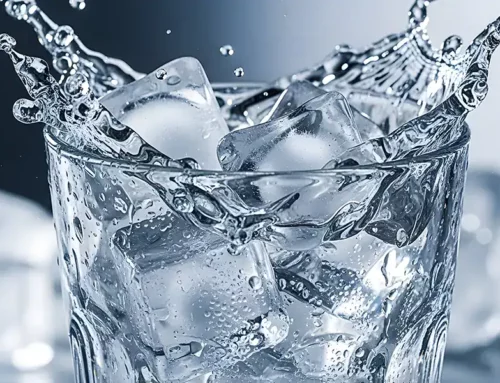
Creating a craft cocktail with a clear, large ice cube is a statement. It elevates the drink from ordinary to exceptional.
While it might seem like a skill reserved for professionals, carving your own block ice at home is achievable with the right tools, techniques, and a little patience.
This guide will take you through the entire process, from preparing your ice to making the final, precise cuts.
The Importance of Quality Ice
Before we get into the process, let’s clarify the purpose. Why go to all this trouble for ice?
- Slower Dilution: Large ice blocks have less surface area per unit volume than smaller cubes. This means they melt much more slowly, chilling your drink without watering it down too much. This is especially important for spirits like whiskey, where you want to appreciate the full flavor profile.
- Enhanced Aesthetics: A crystal-clear, hand-carved piece of ice looks better. It adds sophistication and care to a beverage, impressing guests and making your home bar feel more professional.
- Purity: The process of creating clear ice, often through directional freezing, removes impurities and trapped air bubbles. This results in a denser, purer ice that doesn’t impart unwanted flavors into your drink.
The Essential Toolkit for Ice Carving
You won’t find most of these items in a standard kitchen drawer. Investing in the proper tools is crucial for both safety and achieving clean, professional results.
You don’t need to spend a fortune, but getting the right equipment makes the job significantly easier and safer.
Must-Have Tools:
- Large, Sturdy Cutting Board: Choose one that won’t slip. A thick wooden or composite board is ideal. It needs to be large enough to handle a substantial block of ice without wobbling.
- Serrated Knife (Bread Knife): The jagged edges of a serrated knife are perfect for scoring the ice. This initial cut creates a guide for a clean break.
- Mallet: Use a rubber or wooden mallet. Avoid metal hammers as they can damage your knife or shatter ice unpredictably.
- Ice Pick: An ice pick is versatile. It can be used to stabilize the block, chip away minor imperfections, and help guide initial splits.
- Paring knife: A small, sharp paring knife trims cubes and bevels edges for final shaping.
- Thick towel or linen: A non-terrycloth towel helps prevent slipping on ice, insulates hands, and ensures a safe grip.
- Safety gear: Wear cut-resistant gloves and safety glasses to protect hands and eyes from blades and shards.
Step-by-Step Guide to Carving Block Ice
With your tools ready, start carving. The process is manageable and improves with practice.
Step 1: Tempering the Ice
First, temper the ice by letting it sit at room temperature to acclimate.
- Tempering prevents fresh-from-freezer ice from fracturing or shattering. Letting it sit relieves internal stress, resulting in cleaner cuts.
- Remove the block from the freezer, set it on a board or in a pan for 20–45 minutes. The duration depends on the block size and room temperature.
- The ice is ready when it turns transparent, feels wet, and internal cracks fade.
Step 2: Scoring the Ice Block
Score a guideline for your first significant cut to divide the block into slabs.
- Place the tempered ice on your cutting board. Use a towel underneath for stability.
- Hold the serrated knife firmly and saw a straight, quarter-inch deep line across the ice. Don’t cut through — create a weak point. Usually, score down the middle first.
Step 3: Making the Split
This is where the mallet comes into play.
- Place the serrated knife (or chisel) in the score line, straight and vertical.
- Hold the knife handle. Firmly tap the spine with the mallet. Repeat as needed, applying steady pressure.
- The ice should split cleanly. If it shatters or breaks unevenly, it likely wasn’t tempered long enough. Don’t be discouraged; let the pieces temper for a few more minutes, then try again.
Step 4: Sizing Down the Blocks
Repeat the score-and-split process to break down the large slabs into smaller pieces closer to your desired final cube size.
- Work in straight lines, cutting slabs in halves or thirds.
- This methodical approach helps you maintain control and minimizes waste from uncontrolled fractures.
- Cut rough cubes slightly larger than needed, giving you space for final shaping.
Step 5: Shaping and Refining the Cubes
This is the final stage where you turn your rough blocks into polished, elegant cubes.
- Hold the small ice block with a towel or linen to prevent melting and ensure a firm grip. The board method is safest for beginners.
- Use a sharp paring knife to shave the sides. Hold it at a slight angle and glide across the ice. You’re shaving, not cutting — like peeling a vegetable.
- Bevel corners and edges for a professional look and slower melting.
- Use the paring knife tip or ice pick to remove imperfections, chips, or cloudy spots. Work slowly.
Step 6: Storing Your Finished Cubes
Once you have a batch of perfectly carved cubes, you’ll want to store them properly.
- Place the finished cubes in a zip-top bag or an airtight container.
- Arrange the cubes in a single layer to prevent them from sticking together.
- Store them in the coldest part of your freezer until you’re ready to use them.
FAQs About Ice Block Carving
How do I make a clear block of ice to begin with?
To get a clear block, you need to control the freezing direction. The easiest home method is to use a small, insulated cooler (like a Coleman Party Stacker) that fits in your freezer. Fill it with water, leave the lid off, and place it in the freezer. The insulation forces the water to freeze from the top down, pushing impurities and air bubbles to the bottom. You can then harvest the clear top portion.
Can I use a regular hammer instead of a mallet?
It’s not recommended. A metal hammer has a tough, small contact point that is more likely to shatter the ice or damage the spine of your knife. A rubber or wooden mallet distributes the force more broadly, resulting in a cleaner split.
Why is my ice still cloudy in the center?
Cloudiness is caused by trapped air and impurities. If you’re using the cooler method for directional freezing, the cloudiness should be pushed to the bottom. If you’re just freezing water in a tray, it will freeze from all sides, leaving a cloudy middle. For clear ice, directional freezing is key.
Is it safe to carve ice with kitchen knives?
It can be, but you must be extremely careful. Always use a thick towel for grip, consider wearing cut-resistant gloves, and never direct a blade toward your body. Using the right tools, like a proper ice pick and mallet, is always the safer option. Never use a flimsy or dull knife.
How long will a carved ice cube last in a drink?
A large, 2-inch carved ice cube can last for over an hour in a spirit-forward drink like an Old Fashioned, chilling it effectively without over-diluting. In a highball with soda, it will melt faster but still significantly slower than standard ice cubes.
My cubes are cracking when I pour liquid over them. What’s wrong?
This is called thermal shock. It happens when a very cold cube from the freezer comes into contact with room-temperature liquid. To prevent this, you can let the cube sit out for a minute or two before using it, or rinse it quickly with cold water to temper the surface.
Can I reuse my carved ice?
Technically, yes, but it’s not ideal. After being in a drink, the cube’s surface will have melted, and it may have absorbed some of the drink’s flavor. For the best experience, especially with fine spirits, it’s always best to use a fresh cube.
What’s the difference between an ice pick and an ice-carving chisel?
An ice pick is a pointed tool used to split, chip, and stabilize ice. A chisel has a flat, sharp blade and is used for more refined shaping, shaving, and creating details, much like a woodworking chisel. For making cocktail ice, an ice pick and a set of good knives are usually sufficient.


Leave A Comment