
Ice carving requires precision, power, and technique. Every tool has a specific purpose.
The right gear lets you shape, detail, and finish ice quickly and safely, whether you’re working a small cocktail piece or a massive event centerpiece.
This guide explains the essential ice carving tools, why they matter, and how to use them confidently.
The Ice Carving Tool Categories You Must Know
Ice carving tools fall into three groups:
- Cutting Tools – remove large chunks
- Detailing Tools – refine and sculpt shapes
- Finishing Tools – polish and smooth surfaces
Skip a category, and your carving suffers.
Cutting Tools — Power & Precision Up Front
These tools shape rough blocks into the sculpture’s basic form.
Chainsaws
This isn’t just any lumber chainsaw.
- Special bar lengths (typically 12–18″)
- Ice-rated chains minimize cracking
- Quick removal of material
- Great for straight cuts and rough silhouettes
When to use: First 20–40% of the carving process.
Handsaws and Bow Saws
Controlled cuts without power.
- Ideal when precision matters more than speed
- Less vibration = fewer chips and cracks
Best for small sculptures or when no power is available.
Chisels & Ice Picks
Manual power tools for controlled cuts.
- Range of widths for different cut sizes
- Ice picks break stubborn chunks
- Chisels create flat surfaces and channels
Pro tip: Pair with a mallet for controlled strikes.
Detailing Tools — Making Ice Look Like Art
Once the rough shape is done, detail tools bring personality to the piece.
Chisels (All Sizes)
- Flat chisels — level planes and remove material evenly
- V-shaped chisels — carve grooves and sharp lines
- Round chisels — hollow out curves and contours
Carvers carry multiple chisels for quick effect changes.
Rifflers and Files
- Fine shaping on curves and edges
- Smooth rough surfaces left by chisels
- Great for undercuts and tight spaces
These refiners take your sculpture from blocky to sharp.
Hand Grinders & Die Grinders
- Small rotary tools for detailed shaping
- Abrasive bits cut fast in tight areas
- Electric or battery options for mobility
Use them when: you need texture, depth, or tiny accents.
Finishing Tools — Polish and Presentation
The last 10–20% determines the professionalism of your sculpture.
Ice Picks and Scrapers
- Remove micro-chips left after chiseling
- Create crisp edges
- Prep surfaces for polishing
Sanding Pads & Abrasive Blocks
- Smooth sanding without deep gouges
- Work well on flat surfaces before polishing
Blow Torches (Propane)
Not to melt — to polish:
- Light pass removes micro-frost
- Leaves glossy, translucent surfaces
- Makes facets catch light
Make a quick pass at a safe distance; too long causes melting.
Workspace Essentials — Not “Nice-to-Have”
Protective Gear
- Safety goggles
- Cut-resistant gloves
- Waterproof apron/gear
- Ear protection for chainsaws
Safety gear is critical; ice shatters unpredictably.
Work Stands and Platforms
- Elevate your sculpture to a comfortable height
- Rotating turntables add control
- Stable surfaces reduce mistakes
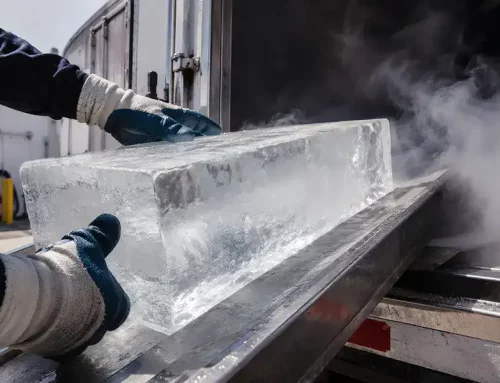
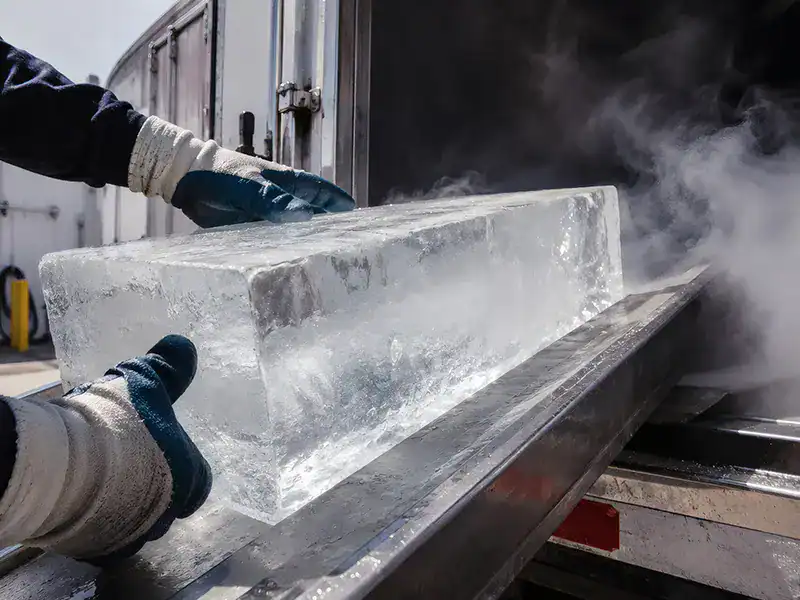
Ice Blocks & Storage
- Clear, bubble-free ice is ideal
- Keep blocks cool until carving
- Position blocks where water and chips can drain easily
Tool Selection: What to Buy First
If you’re building a starter kit, here’s a smart progression:
- Good chainsaw – your core cutting power
- Set of chisels – a range from wide to narrow
- Rifflers & files – fine detail tools
- Hand grinder – fast detail work
- Blow torch – for finishing polish
Start with essentials; add specialty tools as you gain confidence.
Tool Care — Keep Them Sharp, Safe, and Reliable
Neglecting tool maintenance harms performance.
Chainsaw Care
- Keep the chain sharp
- Clean off ice buildup
- Check tension after every use
- Fuel/gas balance and blade inspection
Hand Tools
- Clean after every session
- Sharpen chisels and files regularly
- Store dry, away from humidity
Proper care means longer tool life and better results.
Safety Practices the Pros Never Skip
Keep a Clear Zone
- No bystanders within tool range
- Barriers in crowded events
- Wet floors marked
Stable Positions
- Always carve at waist height
- Don’t reach over your body
- Sync cutting direction with your stance
Warm-Up Tools First
Especially grinders and blow torches — cold metal behaves differently.
Ice Carving Mistakes to Avoid
- Cutting without planning: Always sketch or block out major shapes first.
- Using dull tools: Slow, jagged cuts ruin sculpture details.
- Over-polishing: Too much torching equals melting, not shine.
- Ignoring water management: Puddles cause slips and uneven cuts.
Plan your moves and your tools.
Ice Carving Genres & Tool Choices
Different projects need different priorities:
Event Sculptures
- Large scale
- Chainsaw + chisels + polish
- Fast turnaround
Wedding or Display Pieces
- Detail and finish prioritized
- More chisels, grinders, fine files
Bar/Drink Displays
- Crisp edges
- Precise cuts
- Polished surfaces for clarity
Tool choices follow your project goals. Know them before you start.
FAQs About Ice Carving Tools
What’s the #1 tool every ice carver should own?
A reliable chainsaw — it removes material fast and sets up your sculpture’s basic shape.
Do I need professional-grade tools to start?
You can start with basic tools, but pro gear boosts speed and precision.
Why use a blowtorch on ice?
A torch polishes micro-frost, giving ice a clear finish.
What’s the difference between a chisel and a file/riffler?
Chisels shape and remove material; files and rifflers refine surfaces and smooth detail work.
Are electric tools better than gas tools for ice?
Electric tools are quieter and easier to control; gas tools are more powerful and mobile outdoors.
How do I sharpen my ice carving chisels?
Use a fine file or whetstone with consistent angles — sharp tools cut clean and reduce cracking.
Can I carve ice without power tools?
Yes, but hand tools require more time and physical effort. They’re ideal for smaller pieces or indoor events.
Do tools get damaged by cold?
Only if they’re misused or stored cold and wet, dry, and maintain tools after each session to prevent rust and wear.


i like this website!!! Veryyyyy helpful!!!