Crystal-clear ice forms when water freezes slowly from a single direction, a process known as directional freezing.
Standard freezers freeze water from all sides at once, trapping air bubbles and minerals in the center and causing cloudiness.
Insulating the water and freezing from the top down pushes impurities to the bottom, leaving the top clear.
The Difference between Regular Ice & Crystal-Clear Ice
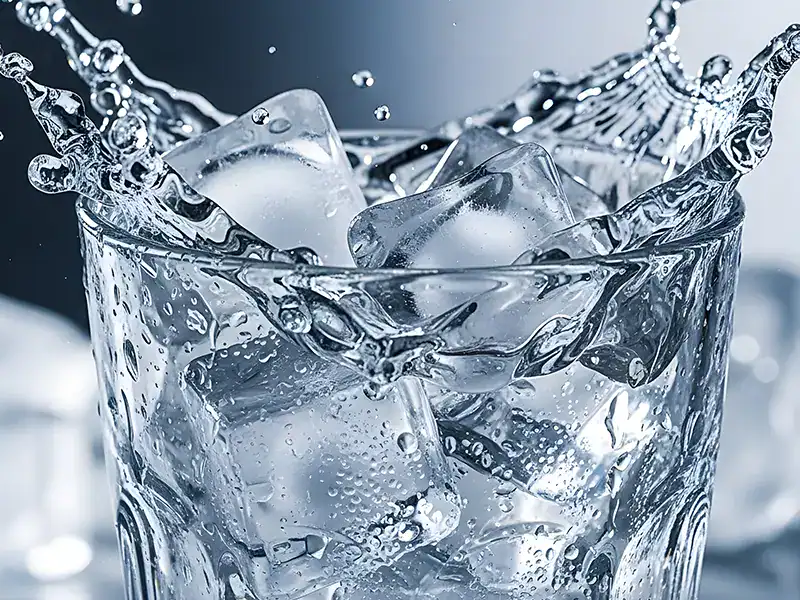
Have you noticed that the ice that comes out of your freezer looks cloudy? Now think about the ice at a nice cocktail bar — perfectly clear, almost like glass.
Clear ice isn’t magic; it’s just science. When water freezes slowly in one direction (top to bottom), it pushes air and impurities aside, leaving you with a beautiful, glass-like finish. And there actually is a difference.
Cloudy ice melts faster, dilutes your drink more quickly, and can slightly affect taste, especially in cocktails, iced coffee, or lemonade.
Clear ice, on the other hand, is denser, slower-melting, and just looks a lot cooler. And you can make it at home with a simple setup and a little patience.
Why Regular Ice Cubes Get Cloudy
Here’s what’s happening behind the scenes and why you get that familiar cloudy core.
- Tap water contains dissolved gases and minerals.
- In a standard ice tray, water freezes from all sides inward.
- Pure water freezes first, pushing everything else toward the center.
- The center freezes last, trapping impurities inside.
And it’s not just about looks.
- Those trapped air bubbles make ice weaker.
- The ice is more likely to crack, and it melts faster once it hits your drink
The Magic of Directional Freezing
Want clear ice? Think like nature. Picture a frozen lake in winter:
- Cold air freezes the surface first.
- The ground below insulates the water.
- Ice forms from the top down.
- As it freezes, air and impurities get pushed downward
- The top layer becomes crystal clear
This process is called directional freezing, and it’s precisely what we’re going to recreate in your freezer.
Step-by-Step: DIY Clear Ice (Cooler Method)
You don’t need fancy equipment; just a small cooler and some freezer space.
Here’s what you’ll do:
- Get a small insulated cooler. The insulation blocks the sides and bottom from freezing.
- Fill it with water. Tap water is fine, although filtered water is optional for taste. Leave a few inches at the top for expansion.
- Place it uncovered in your freezer. Make sure it sits flat and undisturbed.
- Wait 18–24 hours. You want it about 75% frozen, not solid.
- Remove and flip it into the clean kitchen sink. The ice block should slide out. You’ll see clear ice on top and cloudy ice at the bottom.
- Remove the cloudy portion by tapping it off with a chisel or an ice pick.
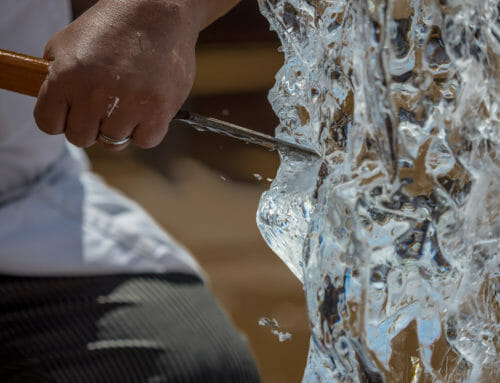
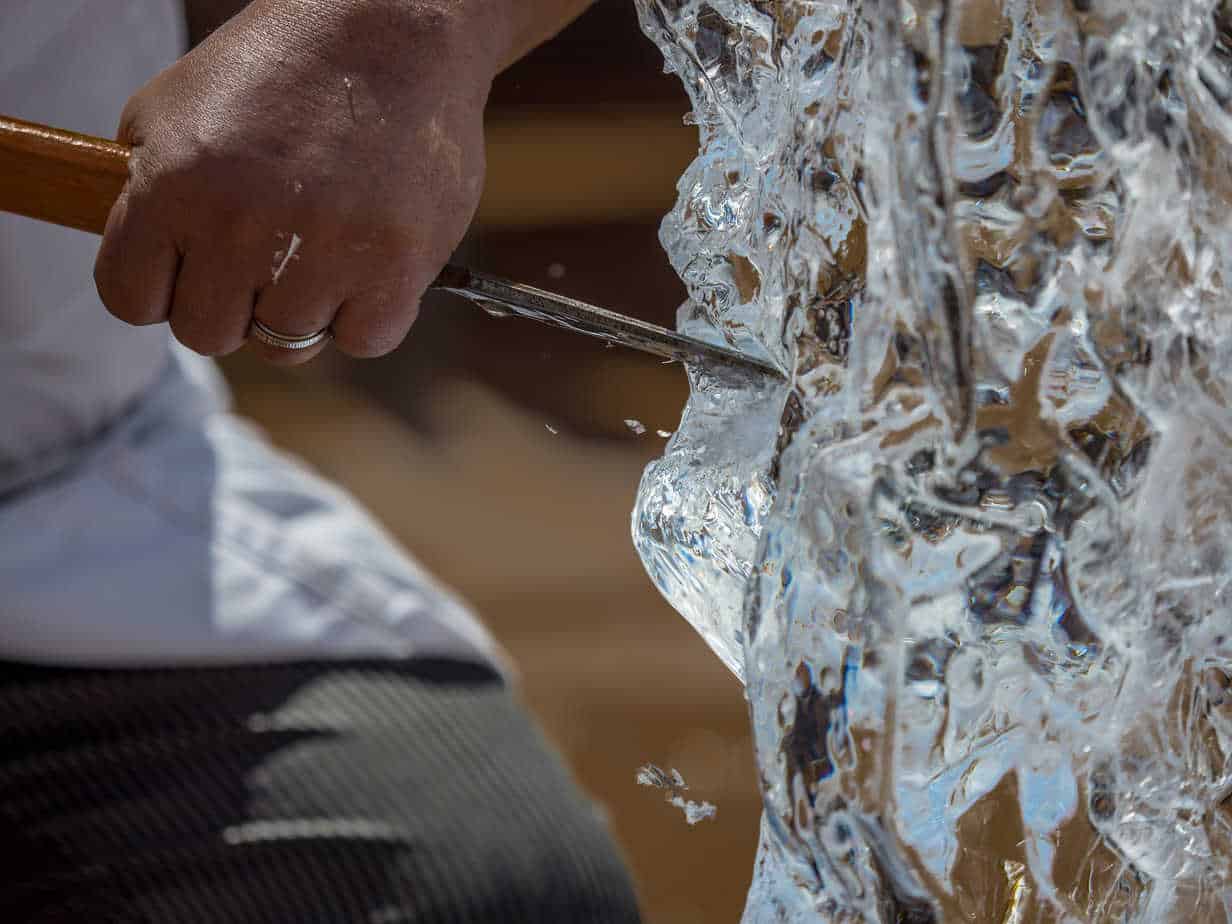
- Let the block sit for ~5 minutes (this is called tempering), then cut it into cubes by scoring a line with a serrated knife, then tapping along the line to split it.
- Place the cubes in freezer bags and freeze until solid.
Hosting Something Bigger? Consider a Local Ice Supplier
Making clear ice at home is suitable for small gatherings or for a fun experiment, but isn’t practical for larger events. In these cases, consider using a professional supplier.
For example, in Southern California, companies like Crystal Ice Company offer:
- Bagged and block ice
- Crystal-clear ice for events
- Ice sculptures
- 24-hour emergency delivery
Whether you try it yourself or source it locally, clear ice is one of the simplest ways to improve both the look and performance of your drinks. It’s a small detail that makes a surprisingly big difference.
FAQs: Achieving Ice Clarity
Q: Does boiling water make clear ice?
No. Boiling removes some dissolved oxygen, but it doesn’t stop cloudiness. Ice will still freeze from the outside in and trap impurities. Directional freezing is what actually works.
Q: Do I need filtered water for clear ice?
No. Tap water works just fine with directional freezing. That said, filtered water can improve the taste of drinks.
Q: Why does clear ice melt more slowly?
Clear ice is denser and more solid, with no air pockets. That means it stays colder longer, melts more slowly, and drinks don’t get watered down as quickly.
Q: Can I use a regular ice tray?
Unfortunately, no. Standard trays freeze from all sides, which causes cloudiness. You need an insulated setup, like a cooler, to control the direction of freezing.
Q: How long does the cooler method take?
Typically, 18–24 hours, depending on your freezer temperature and the size of your cooler. You’re aiming for partially frozen, not solid.
Q: How do I cut the clear ice block?
Temper the block for a few minutes. Score a line with a serrated knife, then tap it along the scoring with an ice pick or a mallet and chisel to split it cleanly. You can store the cubes in a freezer bag.
Q: Is clear ice safe for all drinks?
Yes. Directional freezing separates impurities, leaving you with clean, solid ice that won’t affect flavor.
Q: Can I buy clear ice locally in Southern California?
Yes. If DIY isn’t your thing, local suppliers like Crystal Ice Company offer clear ice, blocks, and even custom options with delivery.


Leave A Comment